So I posted this easy lace kimono 'tutorial' last week. I left the raw edges unfinished and asked for feedback on how you'd finish them off. Well, my lovely inter webs friend, JJ, of Natural Medley gave me a wonderful idea! I was leaning heavily towards a baby or rolled hem, but her suggestion appealed so much so that I immediately knew that's what I'd do. She said, "I went looking for ideas for hemming and found this lovely idea. Tissue paper or fusible paper underneath and hem with a fancy scallop stitch, with no turning, which you then cut away afterwards to mimic the scalloped hemline at the base. http://mellysews.com/2014/02/sew-lace.html". Let me just say, yes!
Here's the final result folks, and the tissue paper was recycled from previously used gift wrap that I save in a drawer ;).
Isn't it pretty? Not bad for my first time trying this, and I may need to try it again very soon.
What I'm having trouble with is styling it...does it look too 'bedroom' or does this work? I don't normally second-guess things, but this one has me scratching my head a bit. Maybe a beach cover-up? Though, admittedly, it wouldn't cover much. We'll see.
Here's another close-up of those scalloped edges in action :). Thanks again, JJ, for such a perfect idea and be sure to head over to Melly Sews for this and many many more helpful sewing hints!
Now, what shall I refashion/diy next...time to dig through my stash!
Peace,
Andrea
Showing posts with label kimono. Show all posts
Tuesday, April 14, 2015
Wednesday, April 8, 2015
DIY Lace Kimono
I picked up a piece of pink lace last month at the thrift store. It was about 63 inches long by 38 inches wide. I think it cost $2.
I started by trimming off the ends to leave the pretty scalloped edge for the hem. Then I folded it in half and wrong sides together, sewed up each side about 2/3 from the bottom. I trimmed the seam allowance and turned it inside out, then sewed up each seam enclosing the raw edges. French seams are much cleaner and nice when you don't have a serger to finish raw edges.
Next, I folded the 'top' in half and cut out a shallow hole along the fold/top to create a neck hole.
Once I'd finished that, I then pulled the 'back' fabric out, and cut along the fold through just the 'front' layer.
And that's where I've left off. I haven't finished off my raw edges because I'd love to pose the question to you all. How would you finish off the edges of this lace kimono? Would you simply fold once and topstitch? Fold twice? Or use some sort of trim? I want to keep the relaxed edges, but am afraid that if I finish them off it will change the drape and annoy me ;). I was considering a baby hem, but same issue...so, what would you do? What would have the least impact on drape while leaving the garment looking finished? Can't wait to hear your ideas!!! Meanwhile, I love this light and airy kimono that will be great over a casual work outfit or over a dress for a date night! I'll do some more styling once I finish it off :)
Peace,
Andrea
Thursday, June 19, 2014
Cropped Kimono
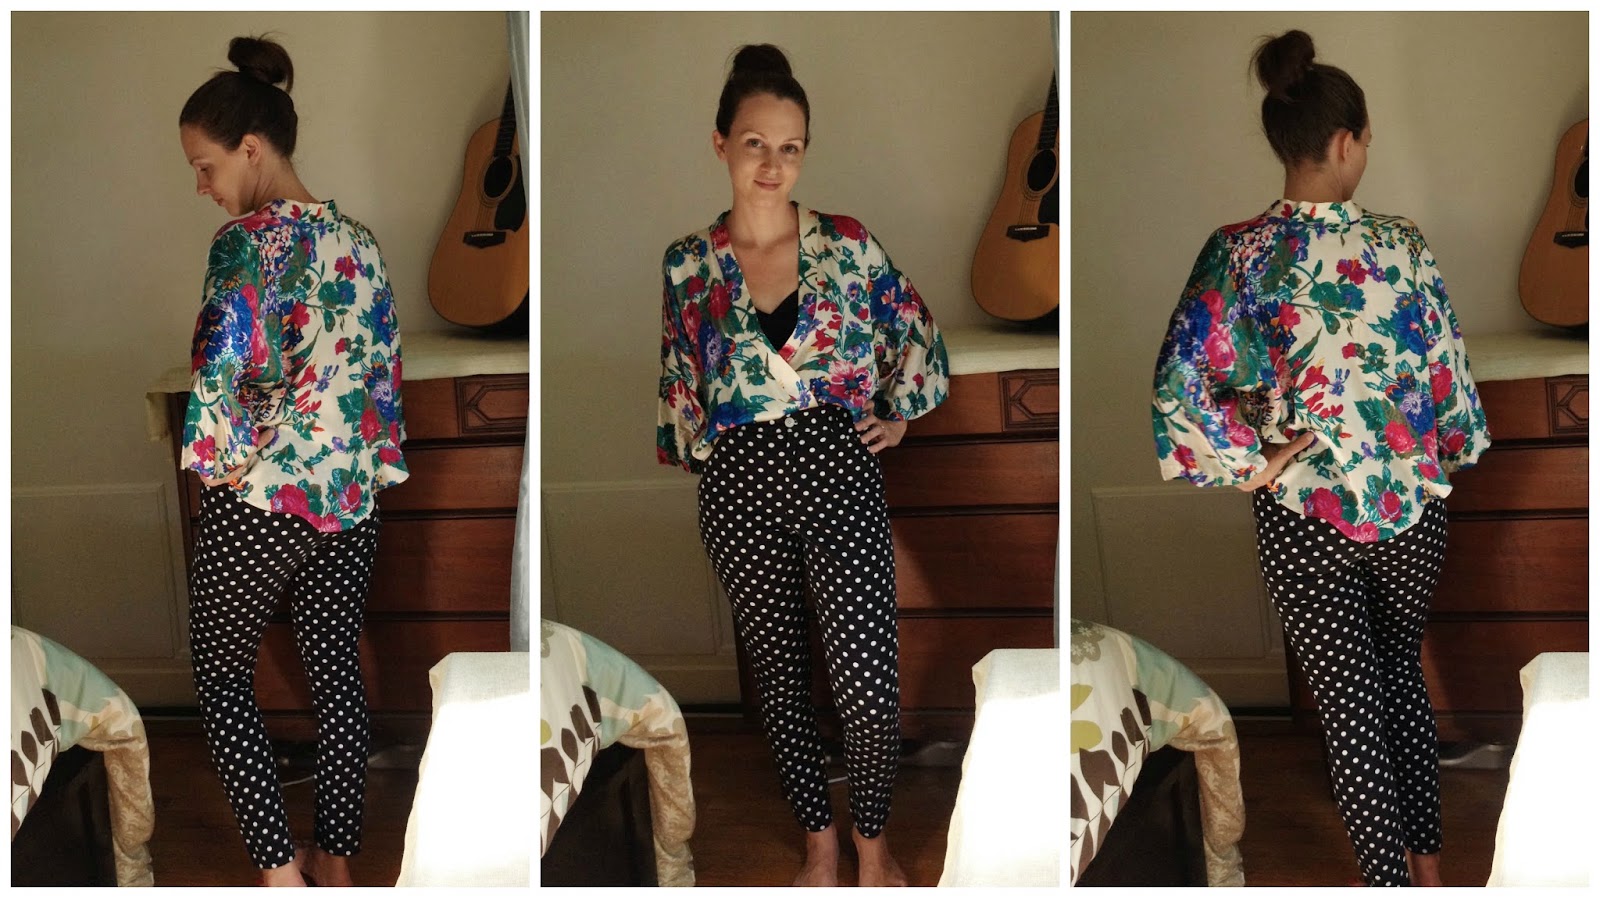
As you can see in these bad photos, I decided to go above the pockets, leaving me with a cropped length. I started my cut just below the existing collar/lapel thingies, curved up slightly as I reached the side seam, dipped back down for a rounded back hem, and repeated the same curve on the other side. I finished off the raw edge with a baby/rolled hem.
I started playing around with how I'd style it and was having some difficulty...I wasn't liking it at all! Here's my first go with a me-made knit pencil skirt and a neon crop top I won in a giveaway (more on that tomorrow!!!). It's ok, and if my hair wasn't a greasy mess and my belly a bit puffy after 'cheating' on my diet this past month, maybe I'd like it better.
So, I decided to try some different things. Here I put on a shorter (thrifted & refashioned) skirt, and made my kimono into a blouse by cinching it closed with a (thrifted) gold belt.
Then I thought, how about tying/wrapping it and tucking it...so I did that with the pencil skirt and my bathing suit top (I could have used a bustier/crop top as well). Then, I figured, hey, I'd totally throw this on at the pool if my back and shoulders were getting too much sun, so why not tuck it the same way into my high-waisted bottoms?
This last look is a bit too much, for me, though I think with a smaller polka dot it could be really cute. I'll simply switch out these high-waisted (thrifted & refashioned) pants for a pair of skinny jeans (highwaisted & etc.).
So, though I was at first skeptical, I'm loving it after all! AND I still have the whole bottom part to use up in other fun projects...I already have a few ideas from some blouses I've seen ;). But, I'd love to hear if you all have any ideas. I could even put together another kimono from what's left over to put up for sale! We shall see.
Stay tuned for an initial look at the awesome giveaway I won, and some styling of one of the pieces! Can't wait to show you :)
Peace,
Andrea
Friday, June 13, 2014
Friday Quick 'Fix': DIY Kimono
I've got a quick post today highlighting an easy DIY tutorial care of Merrick of Merrick's Art. Her super simple DIY was featured on Babble here. I followed her instructions and finished in under 30 minutes! I call that a win...and a quick 'fix'. :)
![]() |
| Image c/o Merrick's Art |
I started with this thrifted piece of vintage polyester fabric:
I cut it to the correct dimensions, folded it in half widthwise, cut, then sewed halfway down right sides together. Next I folded it in half lengthwise, sewed down the two sides leaving approximately 10 inches for the sleeve openings, and cut the front corners in a curve. I decided not to finish off the edges, though a baby/rolled hem would give it a more professional look.And there you have it! A fun kimono-style jacket perfect for a cool, rainy day :). I got immediate compliments when I decided to wear it just after finishing it...another reason I decided not to hem ;). I couldn't wait to put it on! Seriously, go check out Merrick's version, as the fabric she used is amazing and her styling is impeccable.
I'll explain the exceptionally poor photography by simply saying this: rain.rain.gray.gloomy.rain. Five days worth!!! Yup...but we're supposed to have sunny days this weekend, which makes me all kinds of happy. Oh, and my son took the pictures of me, and let's just say that my five-year-old is totally over taking pictures of his mother. (See how I blamed my preschooler? Yeah, better than explaining that I was too lazy to set up my tripod, iPhone and remote to take them myself...I won't be winning any mom-of-the-year awards, eh?) I'll do better next time ;).
Peace,
Andrea
Subscribe to:
Posts (Atom)